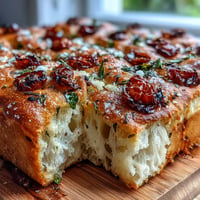
 Save to Pins
 My neighbor Janet showed up at my door with a casserole dish one Tuesday evening, steam still rising from the lid, and said, "Try this at your next potluck." That dish was her jalapeño cheddar funeral potatoes, and honestly, I'd never heard that name before—turns out it's what they call the comfort food staple at church gatherings and family events where people need feeding and solace. One bite and I understood the appeal: creamy, cheesy, with just enough heat to make you sit up and pay attention. I've since made it dozens of times, and it's become my go-to when I need something that feels both fancy and deeply comforting.
I'll never forget bringing this to a potluck where someone's aunt made three other potato casseroles—green bean, sweet potato, and some kind of loaded ranch situation. My jalapeño cheddar was the only one that came home empty, which felt like winning a quiet, delicious victory. The next time I saw that aunt, she asked for the recipe, and I felt oddly proud handing it over.
What's for Dinner Tonight? 🤔
Stop stressing. Get 10 fast recipes that actually work on busy nights.
Free. No spam. Just easy meals.
Ingredients
- Frozen shredded hash brown potatoes (32 oz): Using frozen means no peeling or shredding, and they thaw quickly while you prep everything else—this is the shortcut that makes the whole recipe doable on a weeknight.
- Sharp cheddar cheese (2 cups, shredded): The word "sharp" matters here; it gives you actual cheese flavor instead of that mild, forgettable taste you get with mild cheddar.
- Sour cream (1 cup): This creates the creamy base and adds a subtle tang that balances the richness without making it feel heavy.
- Condensed cream of chicken soup (10.5 oz can): Yes, it's a convenience ingredient, but it adds body and umami that you'd struggle to replicate from scratch, and it's why this dish tastes like home.
- Unsalted butter (1/2 cup melted for filling, 1/4 cup for topping): Melted butter incorporates more evenly than cold butter, and using unsalted lets you control the salt level yourself.
- Whole milk (1/2 cup): This loosens the mixture to the right consistency; too thick and it becomes gluey, too thin and it separates during baking.
- Jalapeños (2 medium, seeded and diced): Seeding removes most of the heat but keeps the flavor, which is perfect if your crowd includes heat-sensitive eaters—you can always add more for yourself.
- Yellow onion (1/2 cup chopped): The onion softens and almost disappears into the filling, adding sweetness and depth without being noticeable as distinct pieces.
- Garlic powder (1/2 teaspoon): This is easier to distribute evenly than fresh garlic, and it won't clump up in the cold sour cream.
- Kosher salt and black pepper (1/2 teaspoon and 1/4 teaspoon): These season the filling itself so every bite tastes balanced, not just the surface.
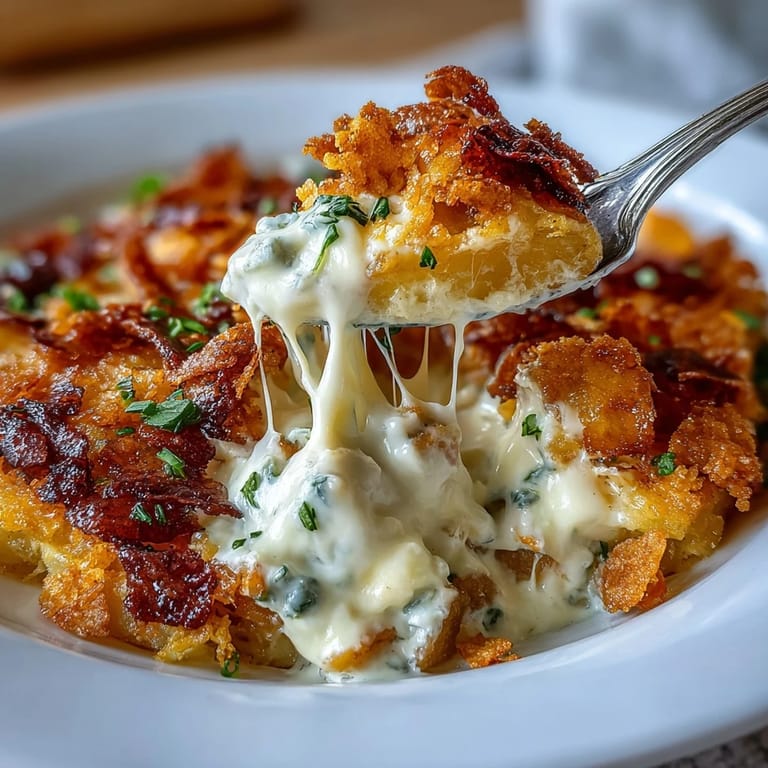
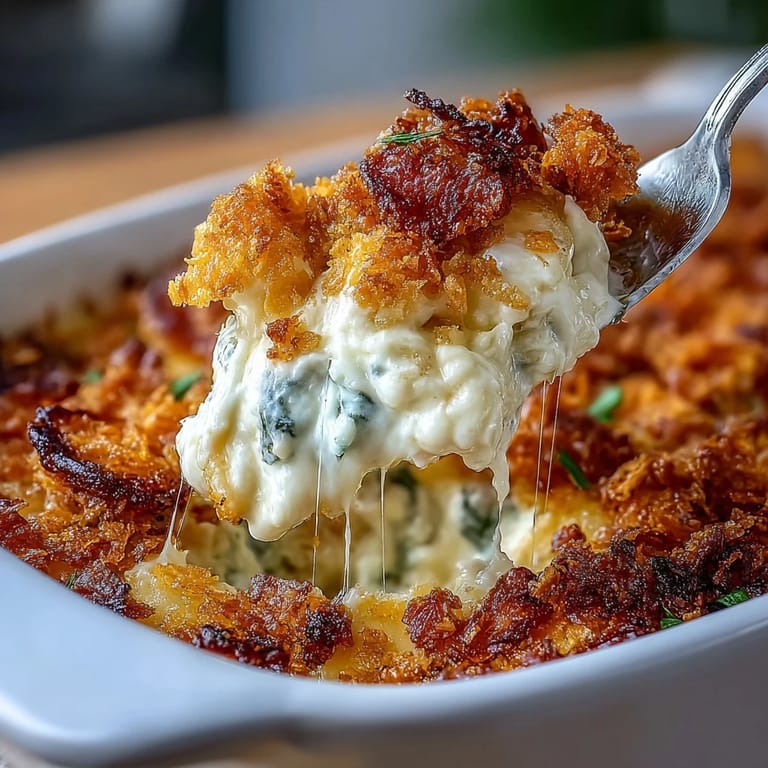
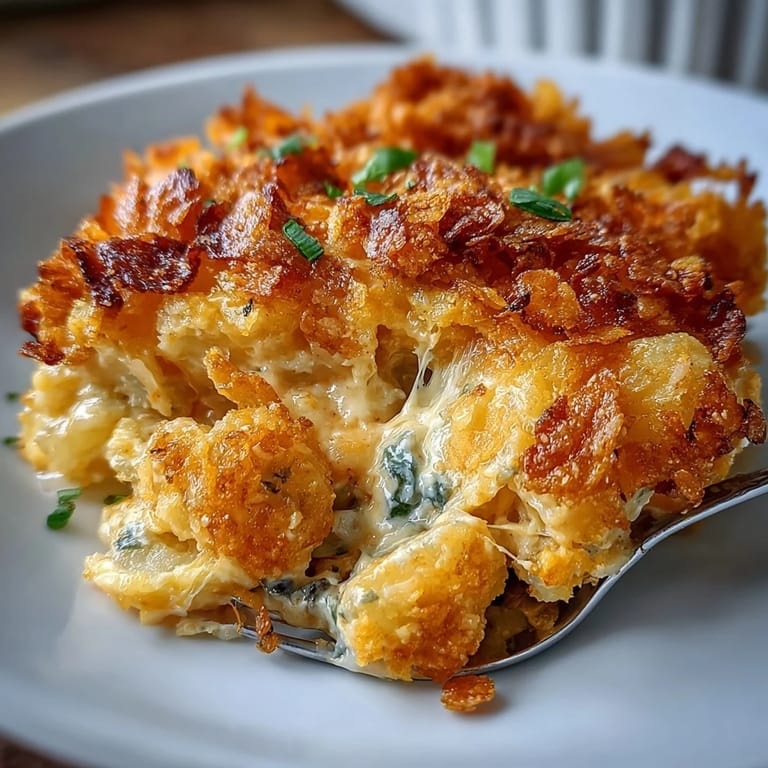
- Cornflakes (2 cups, lightly crushed): They create a topping that's crispy when it comes out of the oven but stays tender underneath where it touches the cream sauce—the best of both textures.
Instructions
- Get your oven and dish ready:
- Preheat to 350°F and grease your 9x13-inch baking dish with nonstick spray or a little butter so nothing sticks to the bottom later. This temperature is gentle enough that the edges won't brown before the middle cooks through.
- Build the filling:
- In a large bowl, combine your thawed potatoes, shredded cheddar, sour cream, soup, melted butter, milk, diced jalapeños, onion, garlic powder, salt, and pepper. Stir until everything is evenly distributed and no streaks of sour cream or soup remain visible.
- Spread into the baking dish:
- Pour the potato mixture into your prepared dish and use a spatula to smooth the top so it's relatively even. This ensures the topping cooks uniformly and you don't end up with thick spots and thin spots.
- Make the crispy topping:
- In a separate small bowl, toss your crushed cornflakes with the 1/4 cup melted butter, stirring until every piece is coated. The butter is what makes them turn golden and crispy instead of staying pale and bland.
- Top and bake:
- Sprinkle the buttered cornflakes evenly over the potato filling, then slide the dish into your preheated oven for 40 to 45 minutes. You'll know it's done when the top is golden brown and the edges are bubbling up at the sides—don't skip the bubbling part, that's how you know the filling is hot all the way through.
- Rest before serving:
- Pull it from the oven and let it sit for about 10 minutes so the filling sets up slightly and becomes less soupy when you scoop it. Those 10 minutes also give you time to move it to a serving table or let it cool enough that people won't burn their mouths.
 Save to Pins
 There's something about watching people take that first bite and then immediately reach for seconds that makes this dish feel like more than just a side. A friend once told me it reminded her of comfort, and I think that's exactly what funeral potatoes are supposed to do—show up, feed people, and ask nothing in return except to be enjoyed.
Heat Level and Flavor Adjustments
The beauty of this recipe is that the jalapeño heat is totally adjustable depending on your crowd. If you're cooking for people who avoid anything remotely spicy, seed those peppers thoroughly and use just one medium one finely minced; most people won't even notice it's there, but you'll taste the subtle flavor. If you're feeding adventurous eaters or just want more kick, leave some seeds in, add an extra jalapeño, or dust the filling with a pinch of cayenne pepper before spreading the cornflakes on top.
Why Cornflakes Instead of Breadcrumbs
When I first made this, I used panko breadcrumbs because that seemed more refined, and the result was fine but forgettable. The cornflakes are what make this dish special—they get crispy and slightly sweet, they don't turn heavy or dense, and they remind people that this is comfort food, not something pretending to be something it's not. If you truly can't find cornflakes or prefer panko, go ahead and use it, but you're missing out on the nostalgic crunch that makes people come back for thirds.
Timing and Make-Ahead Options
You can assemble this dish up to 24 hours in advance—just skip the cornflake topping, cover it with plastic wrap, and refrigerate. When you're ready to bake, add 5 to 10 minutes to the cooking time since it'll start cold, then top with the buttered cornflakes about halfway through so they don't brown too much while the filling warms up. Some people like to bake it completely, cool it, then reheat it gently covered with foil, which works fine if you're bringing it to a potluck and want to show up with a warm dish ready to go.
- Assemble up to 24 hours ahead, cover, and refrigerate until baking time.
- Add 5 to 10 minutes to baking time if the casserole goes in cold.
- Or bake completely, cool, and gently reheat covered with foil before serving.
 Save to Pins
 This casserole has shown up to more of my gatherings than I can count, and it never fails to disappear. That's the kind of recipe worth keeping close.
Frequently Asked Questions
- → Can I make this dish vegetarian?
Yes, substitute cream of mushroom soup for the cream of chicken to keep the dish vegetarian.
- → How do I add more spice to this casserole?
Include jalapeño seeds or sprinkle a pinch of cayenne pepper to increase the heat.
- → What can replace cornflakes for the topping?
Panko breadcrumbs work well as a crunchy alternative topping.
- → How long should I bake the casserole?
Bake uncovered for 40-45 minutes until the top is golden brown and bubbly.
- → Can I prepare this dish ahead of time?
Yes, assemble and refrigerate before baking; increase baking time slightly if chilled.