 Save to Pins
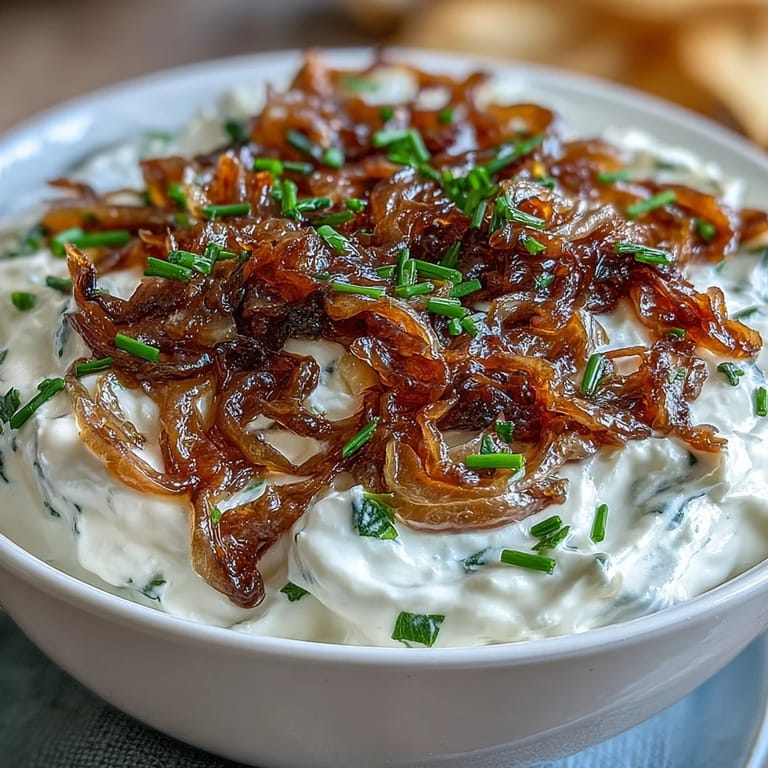
 My neighbor showed up one afternoon with a mysterious container and a knowing smile, saying she'd finally cracked the code on a dip that made everyone at her book club lose their minds. She wouldn't give up the exact ratio, but watching her swirl Greek yogurt into caramelized onions changed how I thought about party food—suddenly it wasn't just something to throw together, it was an event worth planning around. That first bite was a revelation: tangy, savory, almost luxurious in its simplicity. Now I make this whenever I need people to feel welcomed, and I've stopped counting how many times someone asks for the recipe.
I made this for a potluck where I barely knew anyone, and it became the unexpected conversation starter—people were genuinely curious about what made it taste so different from every other onion dip they'd ever had. Watching someone's face light up when they realize it's not heavy or cloying is honestly one of my favorite small kitchen victories. By the end of the night, the container was completely empty and someone had already asked if I could make it again next month.
What's for Dinner Tonight? 🤔
Stop stressing. Get 10 fast recipes that actually work on busy nights.
Free. No spam. Just easy meals.
Ingredients
- Yellow onions, thinly sliced (2 large): Don't rush the slicing—thin pieces caramelize evenly and turn into jammy gold ribbons that are the whole point of this dip.
- Unsalted butter (1 tbsp): Adds richness and helps the onions brown more gracefully than oil alone ever could.
- Olive oil (1 tbsp): Prevents the butter from burning and keeps the onions from sticking as they break down.
- Salt and sugar (1/2 tsp each): Salt draws out moisture from the onions, and a pinch of sugar speeds up caramelization without making anything taste sweet.
- Plain Greek yogurt (2 cups): Use full-fat or 2% for the creamiest texture—low-fat versions can feel thin and chalky.
- Mayonnaise (1/2 cup): This is what makes the dip luxurious and helps it hold together; don't skip it thinking Greek yogurt alone will do the job.
- Worcestershire sauce (1 tsp): Adds a savory umami depth that makes people wonder what you're hiding in there.
- Garlic and onion powders (1 tsp and 1/2 tsp): These are different from fresh versions and work here to build a subtle background flavor.
- Fresh chives (1 tbsp plus garnish): The fresh onion flavor cuts through the richness and reminds your mouth this is a vegetable-based dip.
- Fresh lemon juice (1 tbsp): Brightens everything and prevents the dip from feeling one-note or heavy.
- Black pepper (1/4 tsp freshly ground): Grind it just before mixing so you actually taste the pepper instead of old dust.
Instructions
- Melt butter and oil, then add your onions:
- Heat a large skillet over medium and add the butter and olive oil together. Once they're foamy and smell nutty, add your sliced onions, salt, and sugar if using, stirring to coat everything evenly.
- Caramelize slowly and patiently:
- This is the part where you can't rush—stir every few minutes as the onions release their water, shrink down, and gradually turn from pale to deep golden brown. It takes 25 to 30 minutes, and somewhere around the 20-minute mark you'll wonder if they're ever going to actually caramelize, but they will. Watch the heat so nothing scorches at the edges; turn it down slightly if needed.
- Cool the onions while you build the base:
- Spread the caramelized onions on a plate so they cool faster while you move to the mixing bowl.
- Combine Greek yogurt and everything else:
- Mix together the Greek yogurt, mayonnaise, Worcestershire sauce, garlic powder, onion powder, black pepper, chives, and lemon juice until smooth. Don't overthink this—just make sure everything is evenly distributed.
- Fold in the cooled onions:
- Once the onions are cool, chop them finely so you get little pockets of caramelized flavor throughout instead of big chunks. Gently fold them into the yogurt mixture, keeping a few pieces for garnish if you want to look fancy.
- Taste, adjust, then chill:
- Always taste before you serve; you might want more lemon, more salt, or another splash of Worcestershire. Cover and refrigerate for at least an hour so the flavors meld together and the dip gets cold enough to be really satisfying.
- Garnish and serve:
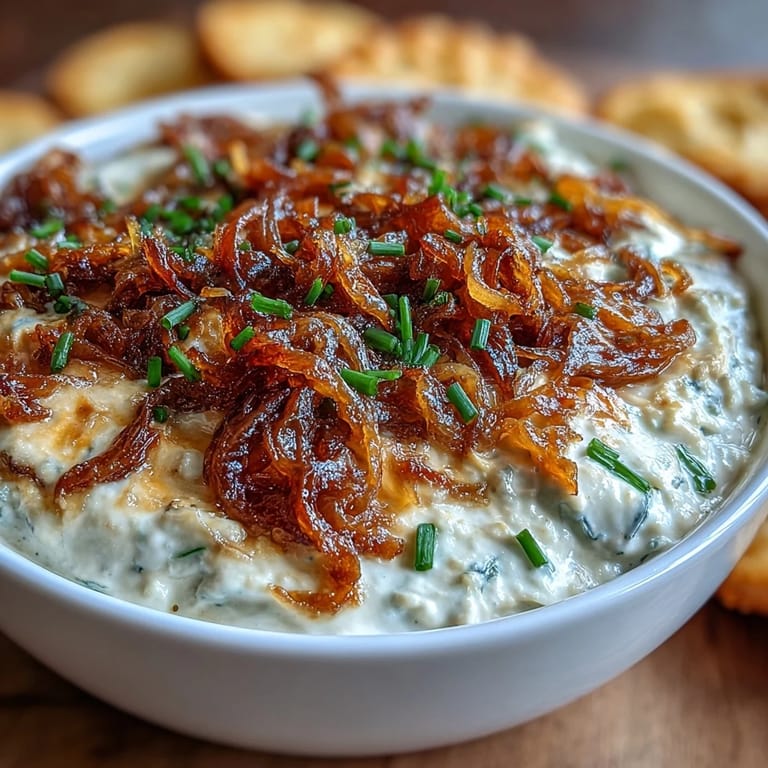
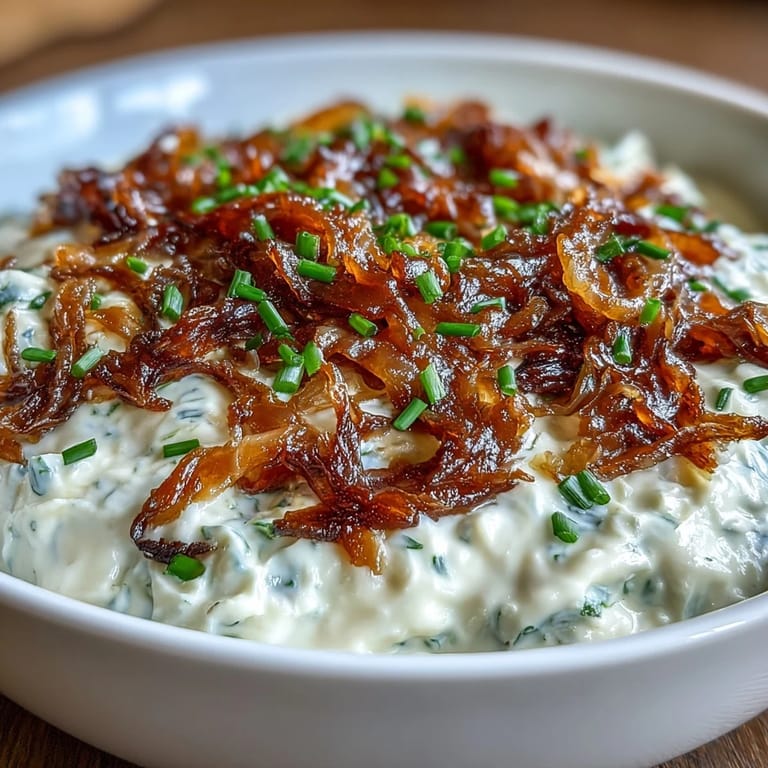
- Top with fresh chives and bring it out with whatever you like to dip—chips, crackers, vegetables, or even spread it on a sandwich.
 Save to Pins
 There's something almost meditative about standing at the stove for thirty minutes, stirring onions and watching them transform from raw to something completely different. My grandmother used to caramelize onions the same way, and making this dip feels like I'm honoring that patience she taught me—that good things don't happen fast, and that's okay.
The Caramelization Secret
The magic isn't in fancy ingredients—it's in giving those onions the time and attention they deserve. I learned this the hard way after trying to speed things up by turning the heat too high and ending up with burnt edges and raw centers. Now I set a timer for every five minutes as a reminder to stir, and I keep the heat at a gentle medium where the onions can do their slow transformation without any drama. The Maillard reaction is doing all the work here, creating hundreds of flavor compounds that no amount of seasoning can replicate.
Making It Your Own
This dip is incredibly forgiving once you understand the foundation. I've experimented with adding a tiny splash of balsamic vinegar to the onions in the last minute of cooking, which adds a sophisticated depth that makes people pause and ask what that subtle sweetness is. Some friends swear by swapping the chives for fresh parsley or scallions, and honestly, whatever fresh green herb you have on hand will work. You could also add a pinch of smoked paprika or a teaspoon of crispy bacon bits if you want to push it in a different direction entirely.
Serving, Storage, and Scaling
This dip is at its best served cold, so make it ahead and let it sit in the fridge for a few hours or even overnight. It keeps beautifully for about four days covered in the refrigerator, and I've found it tastes even better on day two after everything settles. If you're doubling the recipe for a larger crowd, just know the caramelization time stays the same—you're not adding more onions per pan, you're just making two batches.
- Cold dip is best, but if it's been in the fridge for more than two hours, let it sit out for ten minutes so it's spreadable again.
- You can make the caramelized onions up to two days ahead and store them separately, then mix everything together a few hours before serving.
- This dip freezes reasonably well for up to a month if you want to make extra, though the texture becomes slightly softer when thawed.
 Save to Pins
 Every time I make this, I'm reminded that the simplest combinations, made with care and patience, are the ones people remember. This dip has become one of my trusted recipes—the one I reach for when I want to feed people something that tastes thoughtful without requiring any real technique.
Frequently Asked Questions
- → How do I caramelize onions perfectly for this dip?
Cook thinly sliced onions slowly over medium-low heat with butter and oil, stirring frequently until deep golden brown, about 25-30 minutes. Adding a pinch of sugar can speed up caramelization.
- → Can I use low-fat Greek yogurt instead of whole milk yogurt?
Yes, low-fat Greek yogurt works well and lightens the creaminess; you may want to reduce mayonnaise accordingly for balance.
- → What are good serving suggestions for this creamy onion blend?
Serve chilled with potato chips, fresh vegetable sticks, crackers, or as a spread on sandwiches for added richness.
- → How long should the dip rest before serving?
Refrigerate for at least 1 hour to allow flavors to meld and deepen, enhancing the overall taste experience.
- → Are there suitable substitutions for chives in this recipe?
Scallions or parsley make great alternatives, providing fresh, herbal notes without overpowering the dip.