 Save to Pins
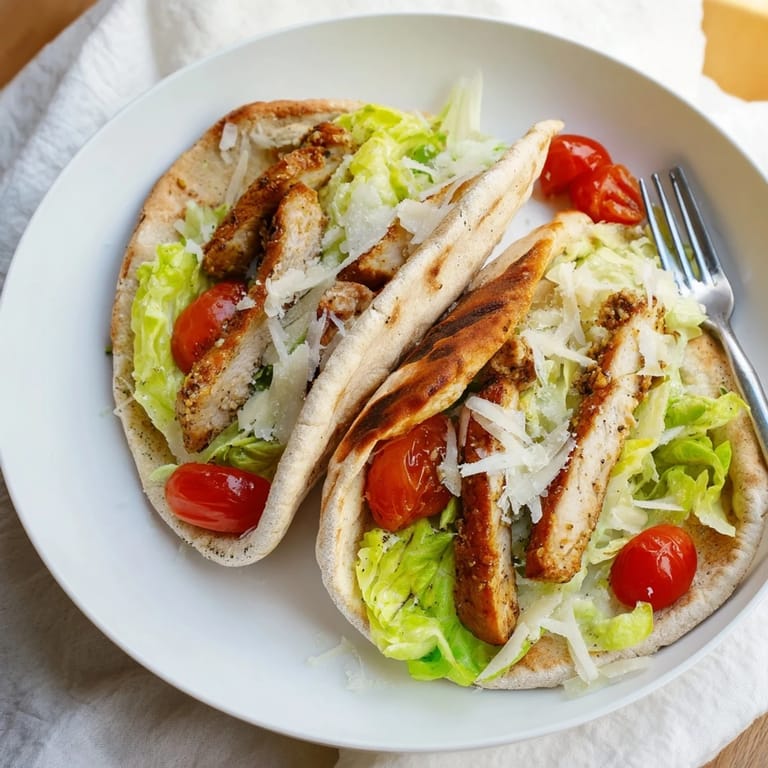
 The first time I made these chicken Caesar pitas, my kitchen smelled like an Italian grandmother had moved in for the afternoon. I was trying to use up leftover pita bread from a failed hummus experiment, and somehow ended up creating something my roommates still request five years later. The crunch of that herbed crust against cool, creamy lettuce is honestly one of those perfect textural contrasts I chase after in every meal now.
Last summer, my neighbor Sarah came over while I was frying up a batch and literally stood over the stove watching the cutlets turn golden. She kept asking what spices I used, and when I finally served her one, she sat on my back porch and refused to share a bite with anyone else. Thats when I knew this wasnt just another weeknight dinner recipe.
Ingredients
- 2 large boneless skinless chicken breasts: Slice them horizontally to make thinner cutlets that cook faster and fit perfectly inside pita pockets
- 1 cup panko breadcrumbs: These create that shatteringly crisp crust that regular breadcrumbs just cannot achieve
- 1/2 cup grated Parmesan cheese: Mix this directly into your breading for salty, nutty flavor in every bite
- 1 tablespoon chopped fresh parsley: Adds bright, fresh color and a grassy note that cuts through the richness
- 1 teaspoon dried oregano and 1 teaspoon dried basil: This classic Italian herb combo gives the chicken that restaurant quality depth
- 1/2 teaspoon garlic powder: Even distribution of garlic flavor without any burnt bits
- 1/2 teaspoon salt and 1/4 teaspoon black pepper: Simple seasoning that lets the herbs shine
- 1/2 cup all purpose flour: The first layer that helps the egg wash stick to the chicken
- 2 large eggs and 2 tablespoons milk: Whisked together to create the perfect adhesive for your crumb coating
- 3 tablespoons olive oil: Just enough to pan fry without making these feel overly greasy
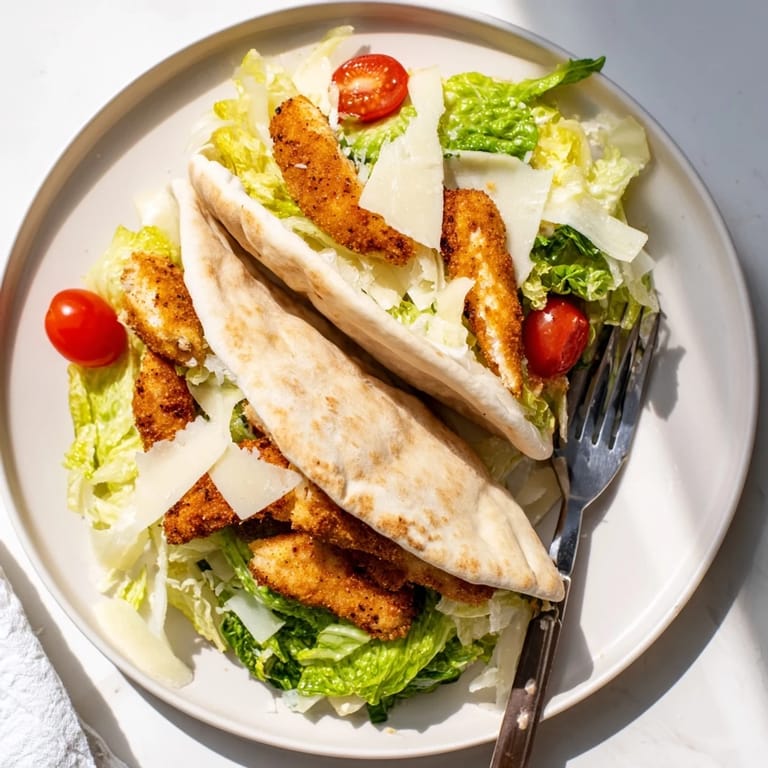
- 4 cups chopped romaine lettuce: Ice cold and crisply chopped for that essential crunch
- 1/3 cup Caesar dressing: Use your favorite brand or homemade, but do not skimp here
- 1/4 cup shaved Parmesan cheese: Additional cheese sprinkled over the salad makes every bite luxurious
- 1/2 cup cherry tomatoes halved optional: Little bursts of acidity that brighten the whole package
- 4 large pita breads: Warm them up so they are flexible instead of cracking when you fill them
- Lemon wedges optional: A squeeze over the top ties everything together beautifully
Tired of Takeout? 🥡
Get 10 meals you can make faster than delivery arrives. Seriously.
One email. No spam. Unsubscribe anytime.
Instructions
- Prep your chicken cutlets:
- Slice each chicken breast horizontally so you have four thinner pieces that will cook evenly and fit inside the pita pockets without overcrowding
- Set up your breading station:
- Arrange three shallow bowls with flour in the first, whisked eggs and milk in the second, and the panko Parmesan herb mixture in the third for an efficient assembly line
- Coat each cutlet thoroughly:
- Dredge chicken through flour, dip it in the egg mixture letting excess drip off, then press firmly into the crumb mixture so it adheres well
- Fry to golden perfection:
- Heat olive oil in a large skillet over medium heat and cook cutlets for about 4 minutes per side until deeply golden and cooked through to 165 degrees
- Warm your pita breads:
- Toast them quickly in a dry pan or warm oven so they become pliable and will not crack when you fill them with the good stuff
- Make the Caesar salad:
- Toss the romaine with dressing and shaved Parmesan in a large bowl until every leaf is lightly coated
- Slice and assemble:
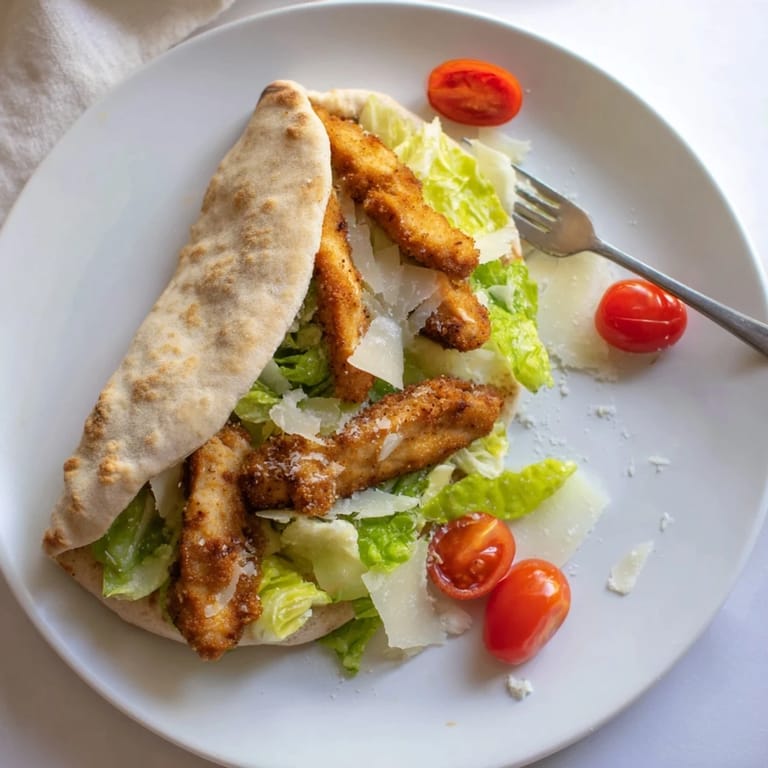
- Cut the crispy chicken into strips, split your pitas in half, and tuck salad inside followed by plenty of those golden chicken pieces
 Save to Pins
 My mom originally scoffed at the idea of Caesar salad in a pocket, but after one bite she admitted this might be better than the traditional romaine arrangement she has been making for thirty years. Now she asks for the recipe every time I visit home.
Making It Your Own
Once you have the basic technique down, these pitas become a canvas for whatever you are craving. I have made them with grilled chicken during summer when turning on the stove feels criminal, and honestly that version is almost as good as the fried original. The key is maintaining that contrast between warm protein and cold, crisp lettuce.
Assembly Secrets
After testing this recipe countless times, I learned that putting a layer of lettuce in first, then tucking the chicken strips on top keeps everything from falling apart when you take a bite. The lettuce acts as a little bed that holds the chicken in place. Also, do not overstuff your pitas or you will lose that satisfying structural integrity that makes them so eatable.
Make Ahead Magic
You can bread the chicken cutlets up to 24 hours ahead and store them on a parchment lined baking sheet in the refrigerator, covered loosely with plastic wrap. When you are ready to cook, they go straight from fridge to pan. The Caesar salad can also be prepped without dressing up to a day in advance, but wait to dress it until right before serving to keep everything crisp and fresh.
- Set up your breading station from left to right so you can move through it with one hand, keeping your other hand clean
- If your pita breads crack when you try to open them, wrap them in a damp paper towel and microwave for 15 seconds to restore flexibility
- Any leftover chicken cutlets make incredible sandwiches the next day, even without the pita pocket structure
 Save to Pins
 These chicken Caesar pitas have become my go to when friends say they are coming over for dinner but I have not been to the grocery store in a week. Something about eating Caesar salad out of a pocket just makes everything feel a little more fun.
Frequently Asked Questions
- → Can I make the chicken ahead of time?
Yes, you can bread the chicken cutlets up to 2 hours in advance and refrigerate them. Cook just before serving to maintain the crispy crust. Alternatively, cook the chicken earlier and reheat gently in a 350°F oven for 5-7 minutes.
- → What's the best way to keep pitas warm?
Wrap warmed pitas in a clean kitchen towel or foil to retain heat while you finish preparing the other components. If making in batches, keep them in a low 200°F oven until ready to fill and serve.
- → How do I prevent the chicken from drying out?
Pound the chicken breasts to an even thickness before slicing, and don't overcook them. Cook on medium heat for 3-4 minutes per side until the internal temperature reaches 165°F. The panko coating helps lock in moisture.
- → Can I use a different type of bread?
Absolutely. Flatbreads, naan, wraps, or sandwich rolls work well. Whole-wheat pita adds extra fiber, while pita chips offer a crunchier texture option for a more deconstructed presentation.
- → What are good substitutions for Caesar dressing?
Try ranch, herb vinaigrette, or garlic aioli for different flavor profiles. Homemade Caesar using Greek yogurt instead of mayo reduces fat while maintaining creaminess and flavor.
- → How do I make this gluten-free?
Replace all-purpose flour with gluten-free flour blend, use gluten-free panko breadcrumbs, and select gluten-free pita or flatbread. Verify your Caesar dressing is gluten-free, as some store-bought versions contain hidden gluten.