 Save to Pins
 My cousin texted me two weeks before her graduation asking if I could bring something festive to the party, and my mind immediately went to cheesecake—but there was a problem. With thirty guests mingling around her tiny apartment, nobody wanted to sit down with a fork and plate. So I got creative and made these bite-sized versions, and honestly, they became the unexpected star of the afternoon. People kept circling back, amazed that something so creamy and sophisticated could fit in the palm of their hand.
I'll never forget watching my cousin's face light up when she saw the little diploma picks sticking out of each bite—it felt like a small thing, but it transformed simple cheesecake into something celebratory and personal. Her friends kept taking photos, and suddenly these weren't just desserts anymore; they were part of the memory.
What's for Dinner Tonight? 🤔
Stop stressing. Get 10 fast recipes that actually work on busy nights.
Free. No spam. Just easy meals.
Ingredients
- Graham cracker crumbs: The foundation that gives you that familiar, slightly sweet crunch that people expect from cheesecake, and melting them with butter creates a crust that holds together without being overly dense.
- Granulated sugar: Use it in both the crust and filling; the ratio keeps things balanced so nothing tastes cloyingly sweet.
- Unsalted butter: Melted, it binds everything and brings that toasted flavor that makes the crust taste homemade, not store-bought.
- Cream cheese: This is your star ingredient—make sure it's softened to room temperature so you don't end up with lumps or air pockets in your filling.
- Egg: Just one large egg sets the filling without making it rubbery; this is key for that creamy texture.
- Vanilla extract: A teaspoon goes a long way in these tiny bites, rounding out the flavor so it tastes complete.
- Sour cream: This adds a subtle tang that keeps the sweetness in check and makes the texture incredibly silky.
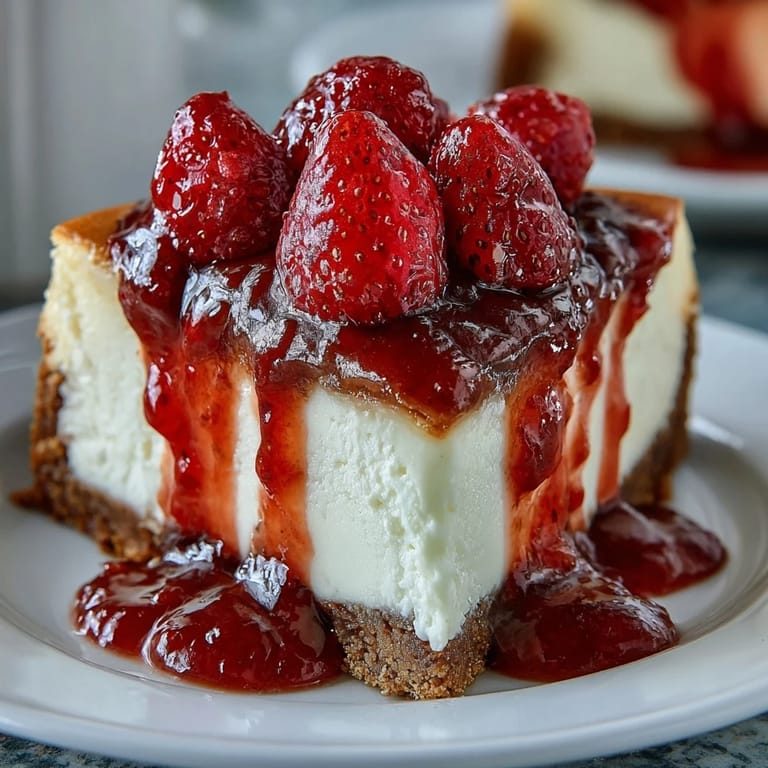
- Fresh berries: Blueberries, raspberries, or strawberries add brightness and look beautiful; choose whatever's in season where you are.
- Fruit preserves: Optional, but they create a glossy finish that makes these look professionally made, plus they add another layer of flavor.
- Diploma picks: The decoration that makes these feel special and tied to the occasion you're celebrating.
Instructions
- Get your setup ready:
- Preheat your oven to 325°F and line a mini muffin pan with 24 liners—having everything prepared before you start mixing means you won't be scrambling halfway through.
- Make the crust:
- Mix graham cracker crumbs, sugar, and melted butter together until it resembles wet sand, then press about a teaspoon firmly into each liner. This packed-down base keeps your filling from sinking, which I learned the hard way on my first attempt.
- Toast the crusts:
- Bake for 5 minutes until they're just set and smell toasty, then let them cool slightly so your filling doesn't start cooking on contact.
- Blend the filling:
- Beat softened cream cheese and sugar until completely smooth—this takes longer than you think, maybe 2-3 minutes, and it makes a huge difference. Once smooth, add the egg, vanilla, and sour cream and blend just until combined; overmixing introduces air bubbles that can cause cracking.
- Fill and bake:
- Spoon about a tablespoon of filling into each crust and smooth the tops with the back of a spoon, then bake for 13-15 minutes until the centers are barely set and still slightly jiggly—they'll firm up as they cool. Overbaking makes them dense, so watch them carefully.
- Cool gradually:
- Let them sit in the pan for 15 minutes before transferring to a wire rack, which prevents the sudden temperature change from cracking the tops.
- Chill completely:
- Get them into the fridge for at least an hour—this is when the magic happens and the flavors come together.
- Top and decorate:
- Once chilled, add a few berries to each bite and, if you want them to shine, gently brush with warmed fruit preserves just before serving. Right before everyone arrives, stick in the diploma picks for that festive finishing touch.
 Save to Pins
 After everyone left that graduation party, my cousin texted me a photo of the empty platter with a caption that just said "the first thing to go." I realized these little bites had done something special—they'd made her celebration taste as good as it felt, and they'd given her guests something to smile about long after the day ended.
Flavor Variations to Explore
Once you've nailed the classic version, you can start experimenting without changing the core recipe. A half teaspoon of lemon zest mixed into the filling brightens everything up, especially if you're serving these in summer when berries are at their peak. You could also swirl in a tablespoon of melted chocolate or a drizzle of chocolate ganache on top for something richer, or try a thin layer of dulce de leche under the filling for a caramel note that people will keep guessing about.
Making Them Ahead for Peace of Mind
The beauty of these bites is that they actually improve when made a day or two in advance—the flavors deepen and the texture becomes more refined. You can bake and chill them completely, store them uncovered on a tray in the fridge for up to three days, then add the berries and picks just before serving so they stay fresh and vibrant. I usually prep everything the day before an event and then spend the morning just doing the final touches, which means I'm not stressed when guests arrive.
Serving Ideas and Presentation Tips
These bites are forgiving in how you present them, which is part of why they work so well for celebrations. You can arrange them on a tiered stand to make them look dramatic, or line them up on a simple platter with fresh mint leaves tucked between for color. The diploma picks aren't just decoration—they actually make them easier to eat standing up, and they instantly tell people what they're celebrating.
- Make sure the cream cheese is softened for at least 30 minutes at room temperature, or it'll be tough to blend smoothly.
- If you're adding the picks just before serving, insert them gently at a slight angle so they look casual rather than rigid.
- Keep them in the fridge until the last possible moment so the filling stays creamy and the crust stays crisp.
 Save to Pins
 These cheesecake bites have become my go-to for any celebration where I want something that tastes impressive but doesn't require hours in the kitchen. Every time I make them, they remind me that the best dishes are often the ones that bring people together.
Frequently Asked Questions
- → How do I prevent the crust from becoming soggy?
Baking the graham cracker crust for 5 minutes before filling helps it set and avoids sogginess once the filling is added.
- → Can I use different berries for topping?
Yes, fresh blueberries, raspberries, or diced strawberries all work well to add natural sweetness and color.
- → What is the purpose of chilling the bites after baking?
Chilling allows the filling to firm up and develop a smooth, creamy texture that's easy to serve and enjoy.
- → Are there alternatives to graham crackers for the crust?
Gluten-free cracker crumbs or crushed nuts can replace graham crackers for gluten-sensitive diets without compromising flavor.
- → How can I enhance the flavor variety of these bites?
Adding lemon zest or a swirl of chocolate into the filling creates interesting flavor variations that complement the creamy base.